How to Wash a Wooden Cutting Board the Right Way

How to Wash a Wooden Cutting Board the Right Way

Posted On: June 4th, 2024

Ever find yourself staring at your wooden cutting board, wondering if you’re giving it the TLC it deserves? Don’t worry; you’re not alone.

Many of us have no clue how to properly clean this kitchen essential. It's wood, after all—so it’s got to be different from plastic or glass, right?

Absolutely! Wood needs a bit of special care to keep it in top shape and prevent it from turning into a bacteria haven. But hey, don’t sweat it; we’ve got your back.

Let’s jump into some straightforward yet effective tips on how to clean your wooden cutting board. Soon, you'll have it looking fabulous and working like a champ in your kitchen.


The Importance of Proper Wooden Cutting Board Care

If you're like me, your wooden cutting board is the unsung hero of your kitchen. Your trusty kitchen tool is always there, ready to handle any cooking task you throw at it. 

But here's the thing - if you don't show your cutting board some love and care, it won't be able to keep up with all those slicing and dicing adventures.

Keeping your wooden cutting board in great condition takes a bit of care, and I'm here to show you how. Trust me, I've learned the hard way that neglecting your board can lead to some unsavory consequences (think bacteria, warping, and funky smells). 

Alright, let's find out together how we can keep that dependable tool of yours working perfectly for years to come.


Understanding the Anatomy of a Wooden Cutting Board

First things first, let's talk about what makes a wooden cutting board so special. Unlike plastic or glass boards, wood is naturally porous. 

This means that wood has tiny little holes that can absorb moisture and harbor bacteria if not properly cared for.

Don’t worry about that. When maintained correctly, wooden cutting boards are actually more sanitary than their plastic counterparts. 

When buying or making a wooden cutting board or butcher block, choose hardwoods that stand out both in strength and beauty—maple, oak, and walnut.

These dense woods are less likely to scratch or develop deep grooves where bacteria can hide.


What Makes Wooden Cutting Boards Special

So, why choose a wooden cutting board over other options? Well, aside from their natural beauty (seriously, a well-crafted wooden board can double as kitchen decor), they have some pretty impressive benefits:

  • Gentle on knives: Wood is softer than glass or plastic, so it won't dull your blades as quickly.
  • Self-healing: Minor scratches in the wood will actually close up on their own over time.
  • Antibacterial properties: Studies have shown that wooden surfaces can kill bacteria faster than plastic.

Plus, there's just something satisfying about the sound of a sharp knife hitting a sturdy wooden board, am I right?


Preparing Your Wooden Cutting Board for Cleaning

Now that you're sold on the awesomeness of wooden cutting boards, let's talk about how to keep them clean. The first step is to prepare your board for a good scrub-down.

After each use, give your board a quick rinse with warm water to remove any loose bits of food. If you've been cutting raw meat (chicken, beef, etc) or fish, it's especially important to clean the board immediately to avoid cross-contamination. No one wants a side of salmonella with their salad.

For stubborn stuck-on food, grab a bench scraper or spatula and gently scrape it off. Avoid using anything too abrasive, like steel wool or harsh scouring pads, as these can damage the wood.


Daily Cleaning Techniques for Your Wooden Cutting Board

Alright, now it's time to get down to the nitty-gritty of daily cleaning. I've tried just about every method out there, and I've found that simple is often best. Here are my go-to techniques:


What You'll Need to Clean Your Wooden Cutting Board 

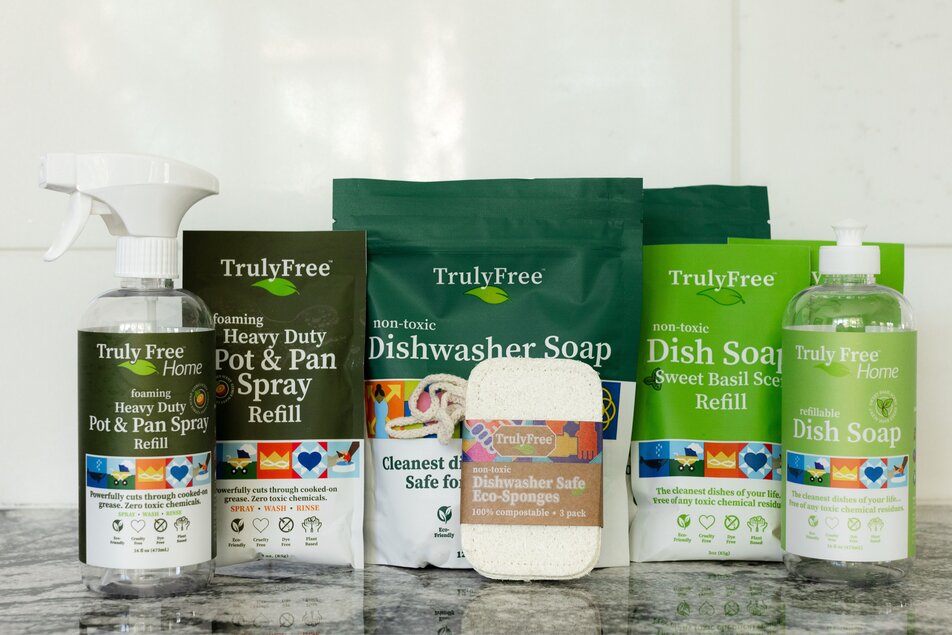
For everyday cleaning, all you need is some hot water and a powerful dish soap like Truly Free Dish Soap. Avoid soaps with harsh chemicals or strong fragrances, as these can linger on the wood and affect the taste of your food.

Wet your cutting board with hot water, add a few drops of this lightly scented dish soap, and give it a good scrub with a soft sponge or cloth. Make sure to clean both sides, even if you only used one. Rinse the board thoroughly with hot water to remove any soapy residue.


Using Vinegar and Water

Vinegar and water solution can work wonders. Mix equal parts white vinegar and water in a spray bottle, then spritz it onto your board. Let it sit for a few minutes to work its magic, then wipe it clean with a damp cloth.

The vinegar's acidity does a great job of cleaning the wood and getting rid of any smells. On top of that, it's perfect if you're trying to avoid using any tough chemicals while cooking or cleaning up.

Pro Tip: Never soak your wooden cutting board in water or put it in the dishwasher. Excess moisture can cause the wood to warp, crack, or even split over time.


Routine Maintenance for Your Wooden Cutting Board

In addition to daily cleaning, your wooden cutting board needs some regular TLC to stay in prime condition. Here are a couple of maintenance tasks to add to your routine:


Best Practices for Sanitizing the Wooden Cutting Board

Even with regular cleaning, your board can still harbor bacteria. To give it a deeper sanitizing treatment, you can use a diluted vinegar solution or a mixture of salt and lemon.

For the vinegar method, mix 1 part white vinegar with 4 parts water. Apply the solution to your board, let it sit for a few minutes, then rinse with hot water and dry thoroughly. Vinegar can zap those stubborn bacteria without using any harsh chemicals.

If you prefer a more natural approach, sprinkle your board with coarse salt (like kosher or sea salt), then rub it with a cut lemon. The salt gently scrubs away dirt, while the lemon's acidic juice kills any germs on the wood. Rinse the board well and dry it completely.


Removing Unwanted Odors and Stains

If your board starts to develop unwanted odors or stains, don't panic. There are a few simple tricks to freshen it up.

For odors, sprinkle the board with baking soda and let it sit overnight. The baking soda will absorb any funky smells, leaving your board fresh and clean. In the morning, just brush off the baking soda and give the board a quick rinse.

For stubborn stains, try making a paste with equal parts salt and lemon juice. Rub the paste into the stain, let it sit for a few minutes, then rinse it away with warm water. The salt and lemon work together to lift the stain without damaging the wood.


Monthly Care: Oiling and Waxing Your Wooden Cutting Board

To keep your wooden cutting board looking its best and prevent cracking or warping, it's important to oil it regularly. I like to give my boards a good oiling about once a month, or whenever they start to look dry.


Choosing the Right Oil and Wax

When it comes to oiling your board, not just any oil will do. You want to use a food-grade mineral oil or a specially formulated cutting board oil. These oils are non-toxic, odorless, and won't go rancid like vegetable or cooking oils can.

You can find food-grade mineral oil at most drug stores or online. You might want to check out Howard Butcher Block Conditioner or John Boos Mystery Oil; they're both pretty popular options.

In addition to oil, you can also use a food-grade wax to give your board an extra layer of protection. Beeswax and carnauba wax are both good options.

Acting as a guard against dampness, these help stop your wooden items from twisting out of shape or breaking apart.


Step-by-Step Guide to Oiling and Waxing Your Cutting  Board

Alright, let's get to the good stuff - here's how to oil and wax your wooden cutting board:

  1. 1. Start with a clean, dry board. If you just washed it, make sure it's completely dry before oiling.

  2. 2. Pour a small amount of oil onto the board, then use a clean, lint-free cloth to spread it evenly across the surface. Make sure to cover the entire board, including the sides and edges.

  3. 3. Let the oil soak in for at least 20 minutes, or even overnight if your board is particularly dry.

  4. 4. After the oil has had time to absorb, use a clean cloth to wipe away any excess. Your board should feel smooth and moisturized, but not greasy.

  5. 5. If you're using a wax, apply a thin layer over the oiled board, then buff it with a clean cloth until the wax is evenly distributed.

  6. 6. Let the wax dry for at least an hour before using your board again.

Repeat this process every month or so, and your wooden cutting board will stay beautiful and functional for years to come.


Proper Storage and Usage Tips for Your Wooden Cutting Board

Now that you know how to clean and maintain your wooden cutting board, let's talk about some best practices for using and storing it.

First and foremost, always use separate cutting boards for raw meats and ready-to-eat foods like fruits and vegetables.

By keeping your food separate, you stop any chance of cross-contamination and make sure everything stays safe to eat.

When you're finished using your board, don't just toss it in a drawer or lean it against the wall. Moisture can get trapped between the board and the surface, leading to warping or mold growth. Instead, store your board upright on a rack or propped up on its side to allow air circulation on all sides.

If you're short on storage space, you can also hang your board on a wall-mounted rack or hook. Just make sure it's completely dry before hanging it up.

Pay attention to how you're handling your knives on that wooden cutting board. It's important for both the knife and the board's longevity.

Always use a sharp knife and cut with the grain of the wood to avoid damaging the surface. Avoid using your board as a makeshift serving tray or hot pad, as extreme temperatures can cause the wood to crack or warp.


Addressing Wear and Tear on Your Wooden Cutting Board

Even with the best care, your wooden cutting board will eventually show signs of wear and tear. But don't worry - most minor damage can be easily repaired with a little elbow grease and some basic tools.

Fixing Scratches and Cracks

For shallow scratches or knife marks, you can usually sand them out with fine-grit sandpaper. Start with a higher grit (around 120) to remove the scratch, then work your way up to a finer grit (220 or higher) to smooth out the surface. Always sand with the grain of the wood, not against it.

If you have deeper cracks or gouges, you may need to fill them in with food-safe wood glue before sanding. Apply the glue to the crack, then use a damp cloth to wipe away any excess. Let the glue dry completely before sanding the area smooth.


Refinishing a Damaged Cutting Board

If your board has extensive damage or is looking a little worse for wear, you may need to refinish the entire surface. Start by sanding the board to smooth out any rough spots. Then, give it a fresh coat of oil and finish with some wax to bring back its original shine.

Start by sanding the board with a medium-grit sandpaper (around 80-100 grit) to remove any deep scratches or stains. Work your way up to a finer grit (150-220) until the surface is smooth and even.

Once you've finished sanding, wipe away any dust with a clean, damp cloth. Then, follow the steps for oiling and waxing your board as outlined above. Your board will look brand new and be ready for many more years of use.


Recognizing When to Replace Your Wooden Cutting Board

As much as we love our wooden cutting boards, there comes a time when they've simply reached the end of their lifespan. If your board has any of the following issues, it may be time to retire it:

  • Deep cracks or splits that can't be repaired
  • Warping or bowing that makes the surface uneven
  • Mold or mildew growth that won't go away with cleaning
  • Persistent odors or stains that can't be removed
  • Excessive wear or damage that affects the board's functionality
  • If you do need to replace your board, don't despair. Think of it as trading in your old phone for the latest model. You'll get better features and performance. Look for a high-quality hardwood board with a smooth, even surface and a sturdy construction.


With a bit of love and regular upkeep, your new board will stay in great shape for many years.

So there you have it - everything you need to know about caring for your wooden cutting board. With these easy tricks, you can keep your cutting board in top shape and ready for any kitchen challenge. Whether you're chopping veggies or carving a roast, it'll handle it all smoothly. Get ready to chop away happily!


Here's the main point you need to remember. 

To keep your wooden cutting board in top shape, rinse it after each use and avoid soaking. Clean daily with mild soap or vinegar solution. Deep clean occasionally with a diluted bleach solution. Oil monthly to prevent cracking and warping, and store properly to allow air circulation.


Conclusion

You’ve made it through the nitty-gritty of washing your wooden cutting board!

Did you know Truly Free Non-Toxic Dish Soap is your cutting board's best friend?

Its plant-powered formula cuts through tough stains and grease, leaving no harmful residues. Not only is it safe and powerful, but it's also gentle on your hands.

I promise, treat your wooden friend right by following these tips on how to wash a wooden cutting board regularly – she’ll last longer than you'd expect!