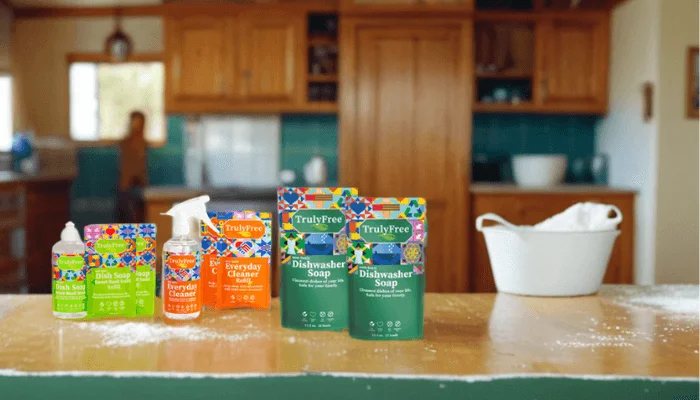
Ways of incorporating Truly Free products in the kitchen clean up process:
This plant-based all natural Dish Soap is perfect for cleaning up sourdough mess by hand. Our natural dishwashing soap is free from harsh chemicals and comes as a concentrate, reducing plastic waste. Key features:
- Non-toxic and biodegradable
- Gentle on hands, which is important when cleaning up after long baking sessions
- Effective at cutting through sticky sourdough residue
- Refillable system aligns with zero-waste baking practice
Truly Free Home Everyday Cleaner:
This chemical free all-purpose cleaner is ideal for wiping down kitchen countertops, utensils, and other surfaces used in sourdough preparation. Features include:
- Plant-based formula safe for food contact surfaces
- Effective at removing flour dust and dough residue
- Scent-free, ensuring it won't interfere with your sourdough's natural aromas
- Versatile enough to clean multiple kitchen surfaces
Truly Free Home Dishwasher Soap (for hands-free cleanup):
For easy cleanup of bowls, measuring cups, and other dishwasher-safe tools used in sourdough baking, our natural dishwasher soap offers:
- Powerful cleaning without harsh chemicals
- Effective at removing dried-on dough and flour residues
- Eco-friendly formula that's septic-safe
- Common asked questions/pain points
Common Sourdough FAQ’s
1. Why is my sourdough bread dense?
Possible Causes:
- Under-proofing: The dough may not have risen long enough during bulk fermentation or the final proof.
- Weak starter: If your starter wasn’t bubbly and active, it may not have provided enough leavening power.
- Insufficient hydration: Too little water in the dough can result in a tighter crumb.
Solution:
- Allow your dough to proof until it doubles in size and feels light and airy.
- Ensure your starter is active and at its peak before using it.
- Experiment with slightly increasing the water in your recipe.
2. Why is my crust too hard or tough?
Possible Causes:
- Overbaking: Leaving the bread in the oven too long can create a hard, overly thick crust.
- Insufficient steam: Steam helps develop a crispy yet thin crust.
Solution:
- Follow the baking times closely and use an oven thermometer to ensure the temperature is accurate.
- Always bake with the lid on during the first part of baking to trap steam.
3. Why does my sourdough bread have big holes?
Possible Causes:
- Over-proofing: If the dough ferments too long, the gluten structure can weaken, causing large, irregular holes.
- Improper shaping: Not shaping the dough tightly enough can also lead to uneven air pockets.
Solution:
- Keep an eye on proofing times and perform the poke test to ensure the dough is ready.
- Practice shaping techniques to create a strong and even structure.
4. Why is my bread gummy in the middle?
Possible Causes:
- Underbaking: The bread might not have baked long enough for the center to cook through.
- High hydration dough: If the dough is very wet, it requires longer baking.
- Cooling too soon: Cutting the bread before it’s fully cooled can make the crumb feel gummy.
Solution:
- Bake until the internal temperature reaches 200-210°F (93-99°C).
- Allow the bread to cool completely (about 1 hour) before slicing.
5. Why doesn’t my bread taste sour enough?
Possible Causes:
- Short fermentation time: A shorter bulk fermentation or proofing time results in a milder flavor.
- Young starter: Starters develop stronger flavors with age.
Solution:
- Extend bulk fermentation or proof the dough in the fridge for a longer period (cold fermentation enhances sourness).
- Let your starter mature over time for a more complex flavor.
6. Why did my bread flatten out?
Possible Causes:
- Over-proofing: The dough may have fermented too long and lost its structure.
- Weak shaping: Improper shaping can prevent the dough from holding its shape.
Solution:
- Proof the dough just until it’s ready (look for signs like doubling in size and a slightly domed surface).
- Practice shaping techniques to build surface tension in the dough.
7. Why is my crust too pale?
Possible Causes:
- Low oven temperature: The oven wasn’t hot enough for proper browning.
- Lack of steam: Steam helps the crust develop a deep color.
Solution:
- Preheat your oven to the correct temperature for at least 1 hour.
- Bake with the lid on for the first 30 minutes to trap steam.
8. Why does my bread have a flat or dull flavor?
Possible Causes:
- Under-salted dough: Salt enhances flavor in bread.
- Inactive starter: If the starter wasn’t strong, it might not have contributed enough flavor complexity.
Solution:
- Ensure your recipe includes the proper amount of salt (about 2% of the flour weight).
- Use a bubbly, well-fed starter for the best flavor.
9. Can I freeze my sourdough bread?
- Yes! Sourdough bread freezes very well. Allow it to cool completely, then wrap it tightly in plastic wrap and foil or place it in an airtight bag. It can be stored in the freezer for up to 3 months. Thaw at room temperature or reheat in the oven for a fresher taste.
10. How do I store my sourdough bread?
- Sourdough bread is best stored at room temperature in a bread box or wrapped in a clean tea towel for up to 3 days. Avoid sealing it in plastic, as this can make the crust soggy. For longer storage, freeze it as mentioned above.
11. Why does my sourdough bread stale so quickly?
- Sourdough bread stales slower than commercial bread due to its natural fermentation, but exposure to air can still dry it out. Store it properly and consider freezing any leftovers to maintain freshness.

